Make your own Crypto currency token
I try & involve the kids in tech whenever I can & have time. They are fairly switched on (no pun intended), we’re a tech home & they are fortunate to have at their disposal stuff like VR to their own dedicated hardware for gaming, TV, remote play, the works. They are immersed as I was when I was a kid playing with telephone lines, CB radios & soldering irons.
They also do home chores, and often they get pocket money. Physical cash. Mostly. This has evolved over the years from physical coins, to money on their own dedicated card so now the natural evolution is to get them into Crypto right? I want to learn & get into Crypto, why not get the kids into it too? What eight-year-old doesn’t want to know about the blockchain!
So after watching an episode of Network Chuck, far too much CoffeeZilla & spending a few hours watching some other non-descript crypto videos I’ve put this guide together to easily follow step by step if you want to create your own token. Nothing new, its been done better than me by better people and I’m in no way a crypto expert, but it was satisfying to follow the process & learn as I went. I wanted to chart my journey into losing all my money in Crypto. So let’s go.
Caveats for the haterz’
Please note, I am not an FA, (Financial advisor), this is a guide to allow people to understand the tech & process, not a sly way into buying MarioCoin (or whatever I choose to call it during this experiment). Also I’m not a Crypto expert, I’m trying to show with this post that anyone can do this stuff.
Pre-amble
We’re going to do several things in this guide. We’re going to spend a bit of time understanding the Blockchain technologies out there, the difference between a Crypto currency and a digital token on a pre-existing blockchain, using Linux to create a token, mint some tokens & then fund them in a wallet & then we’re going to finish with a little bit of DevOps to commit our token to the public blockchain we have chosen to use & personalise it with a name, code & icon.
You will need;
- A Github account
- A crypto wallet of some sort, (I use Coinbase https://www.coinbase.com/), I actually use Metamask for all my crypto stuff, but you can’t use Metamask with SOL, which to explain is outside the scope of this post. So just get a Coinbase wallet, its also worth getting a second, like Phantom Wallet.
- A Linux computer, physical or virtual. You can use a virtual machine at Linode, or you can install Linux in a virtual machine using something like VirtualBox. (doing this is a blog post all in itself so I’ll save that for another time but you can read this guide on the Ubuntu site which is actually the distro I recommend you should use anyway)
- A bit of cash, £20. (it costs a small amount of money to create currency, open wallets etc plus we want to test our token right?)
Grab a coffee, get comfy in front of your computer, fire up the mind juice machine & let’s go.
Get used to wallets.
Get yourself a couple of wallets set up & practice transferring a bit of crypto from wallet to wallet. Until you have confidence that your crypto is not just going to dissafuckingpear. Understand some wallet providers are also exchanges in there own right, like Coinbase. An exchange is where you can view major cryptocurrency performance, buy, sell, trade all from one place. Others include places like Binance or Crypto.com
Wallet providers are often single service providers who offer encrypted wallets to store all your crypto from various places in one place which can be moved around with ease. You may be able to also buy sell and trade with that wallet provider, but often, their features may be a bit more rudimentary. Wallet providers include metamask or phantomwallet for example.
Get a couple of wallets installed both on your phone, and in your browser via a plugin. Get used to transferring, purchasing and storing a small amount of (for the sake of this experiment) SOL. Get comfortable with the process. Each wallet (and you can store multiple wallets in a wallet provider) has a unique identifier which is often a long string, and you pop this in when you send. There’s sometimes a delay, you’ll sometimes need to log in and out of the wallet but transfers on the Solana network should be pretty quick.
Understand that a wallet holds and can hold, multiple crypto types. A wallet must have an account created within it, to house a particular crypto. Think of it as a bit like having an old school mans wallet, with all the little different compartments. Each compartment needs to be made, before it can house a particular type of crypto, even though its in the same wallet. This will make more sense later.
You’ll need Coinbase to buy (not easy to or not possible from Phantom wallet) to then transfer to Phantom (or anywhere else). Also, when transferring wallet to wallet, its easier to have Phantom wallet integrated in your browser on your Linux box to copy & paste wallet addresses too.
Set up your VM & getting prepared.
For this experiment I set up an Ubuntu VM in Virtual box. And just some tips for what I did in terms of this;
- You’ll be copying a lot of complex strings & hashes from place to place, it’s not a bad idea to mount a local disk so you can transfer files & copy & pasted files & content.
- Make sure you have your Github account set up ready
- Get verified on your wallets – you often have to verify on the device you’ve set the wallet up on, so on your VM ensure you can access your email address.
- Setup SSL on your virtual-box, so you can access it from another computer – you don’t need to do this – I did because it was easier to work in a terminal window on my main PC rather than swapping keyboards all the time. Its a ball-ache if you’re new to this, to get your head around virtual adapter configurations in VirtualBox, the notion of NAT & then configuring a static IP on your virtual machine to something on the subnet of your physical home network. Do that & dont forget to actually install & enable both SSH & remote desktop
- Get a notepad & pen!
- All the coffee
A note on remote desktop. Set up two adapters, one bridged, one NATed, and ensure you also enable auto-login, disable screen sharing & enable remote desktop sharing.
Then;
sudo apt install xrdp
sudo systemctl enable xrdp
From that, you should be able to open up RDP in Windows, remote in, using specific connection details specified in sharing in Ubuntu.
What is Blockchain?
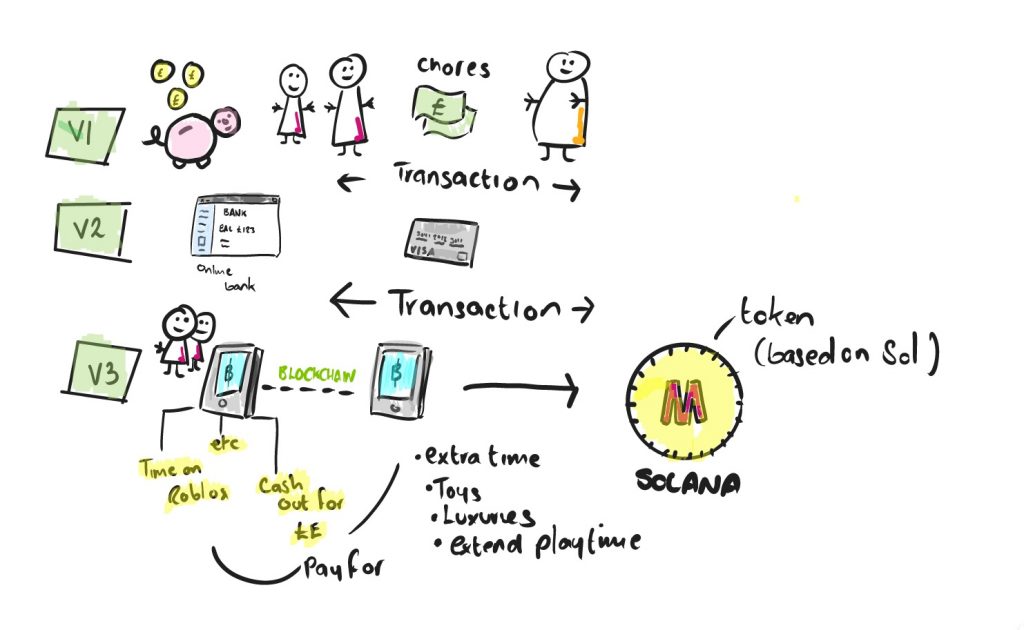
There’s so many guides & explanations on what this is, but just so you know how I explain it in this context, whilst you’re going to hear the term ‘de-centralised ledger’ & indeed it is, think of it as an immutable (meaning you can’t change) record of activity, a diary if you will, of activity pertaining to (in this case) anything in relation to a digital currency. Well known currencies such as Bitcoin, Ethereum, Solana, all have a dedicated blockchain. Some are built on entirely dedicated & bespoke blockchains, others leverage an existing block chain. A bit like how telephony providers use others cellular network to deliver a service.
The blockchain ‘bit’ is the technology providing the immutable record & therefore the inherent trust, & folks like you & I can use those Blockchains but also create our own tokens on them. So we get to play around with currency, without having to build our own blockchain. Because that would be somewhat out of scope. You can think of it exactly like wanting to buy your own Ferrari, you buy the car, but you race it around someone else’s race track. That is the difference between cryptocurrency & what we’re doing today. We’re not going to create a full-blown currency, link it to an exchange, create liquidity pools and advertise it so people can buy/sell/transact with it, we’re just going to create a new crypto token, that we can seed, mint, and fund wallets as an intellectual exercise.
Fee’s
If you want to use a primary coin’s blockchain, you’ll pay fee’s & dependant on the coin, that fee varies. You may have heard the term ‘gas’, if you play around at all with say, Ethereum, to transact on their blockchain, the fee’s are quite high, I personally don’t like the bullshit term of ‘gas’ either but you can read about it here https://ethereum.org/en/developers/docs/gas/
For this experiment, we’ll use Solana, as it’s the cheapest I can find, and its pretty darn quick and its built on Rust. (see later in the post)
Setting up a PC with Virtual Box & Ubuntu
The version of Ubuntu I’m using is the latest, 22.04 & I downloaded VirtualBox, then downloaded the 3gb Ubuntu image & was able to run that as I saw fit. Easy. Make sure you’ve got a decent Internet connection & disk space for the download.
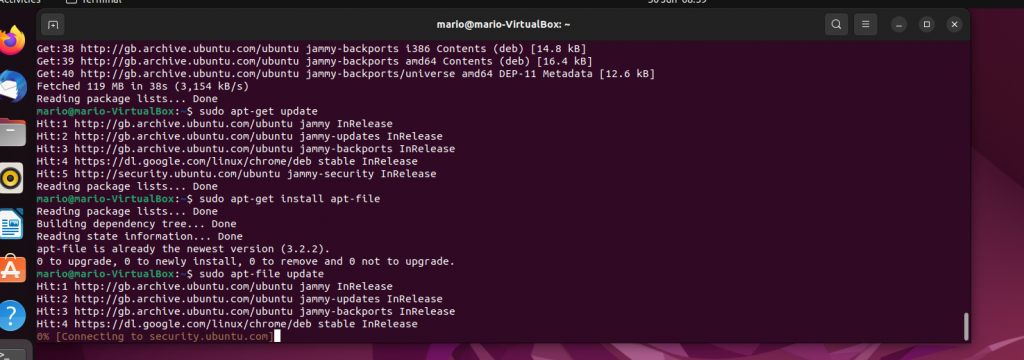
Make sure you do all the updates & run sudo apt update and sudo apt upgrade as one of the first things you do, then keep doing that shit throughout.
I also install Chrome for Debian, rather than use Firefox. So go & do that.
Solana tools
You’ll be installing Solana Tools, & Rust & some dependencies as part of this experiment. Rust is a multi-paradigm programming language with focus on security & concurrency – whatever the fuck that means I don’t care. What you need to know is you’ll need is to create wallets, mint coins & fund wallets, its CLI interface is fairly accessible. Interacting with blockchains on it is built into its command set, Solana’s built on it, and there’s a really interesting article here telling you all about it https://thenewstack.io/solana-rust-developers/
Bare in mind if you’re using a pre-built cloud template of Unbuntu all the environment variables & dependencies maybe already installed. I’ve found installing these pre-req’s before you install solana tools, in fact you need to install curl as a mandatory for example, will help you in the long run. This is what I did on my local machine;
sudo apt install curlsudo apt-get install libssL1.1sudo /sbin/ldconfig-vsudo apt-get install apt-filesudo apt-get updatesudo apt-get install apt-filesudo apt-file updatesh -c"(curl -sSfL https://releases.solana.com/v1.10.23/install)"
So a couple of things there. Step 8 installs the Solana tools. Dependant on the guide you follow, & how old that guide is, it’ll fail if you’re not requesting the latest version. So visit https://docs.solana.com/cli/install-solana-cli-tools to understand the latest version then change that in the command. At the time of writing this, the latest is 10.29 so do please check the documentation.
Once you’ve successfully done the above, don’t forget to update your path environment.
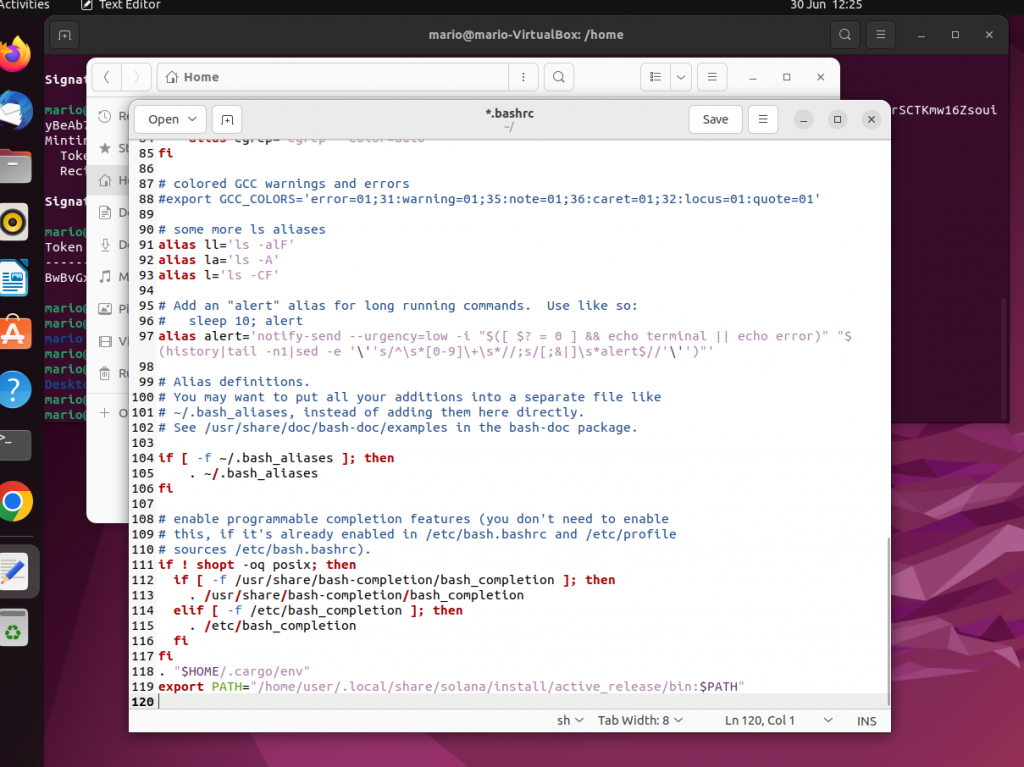
export PATH="/home/user/.local/share/solana/install/active_release/bin:$PATH"
That way, you’ll be able to call the tools commands, and I’ve permanently added this line to my hosts file also. For this, edit the .bashrc file in your home directory, then reload using the source command. You’ll probably reboot your VM a few times so this is really going to help, otherwise you’ll be running commands & they won’t work.
Create a wallet
Now you need to create a wallet that sits on your Linux box, rather than via the cloud, that you can fund.
So run the following command;
solana-keygen new
you MUST write down the public key & pneumonic phrase as you’ll need this for the future
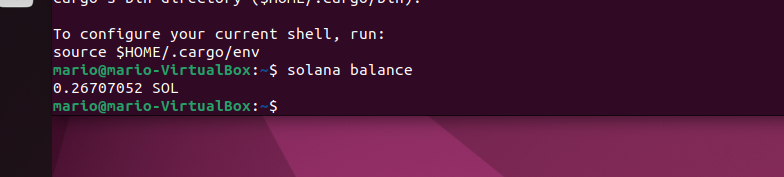
Now send some SOL to it from your cloud based wallet. Use whatever transfer process is applicable for that particular wallet. You can use the command solana balance to check.
Install Rust
You’ll need to install Rust now, so go with
curl https://sh.rustup.rs -sSf | sh
A note on commands, if you’re not used to using it in code & commands, that pipe above is going to give you a headache. Make sure you’re typing an actual pipe and not a similar special command, else that command will never work! Give your terminal a little close & re-open to update those environment variables.
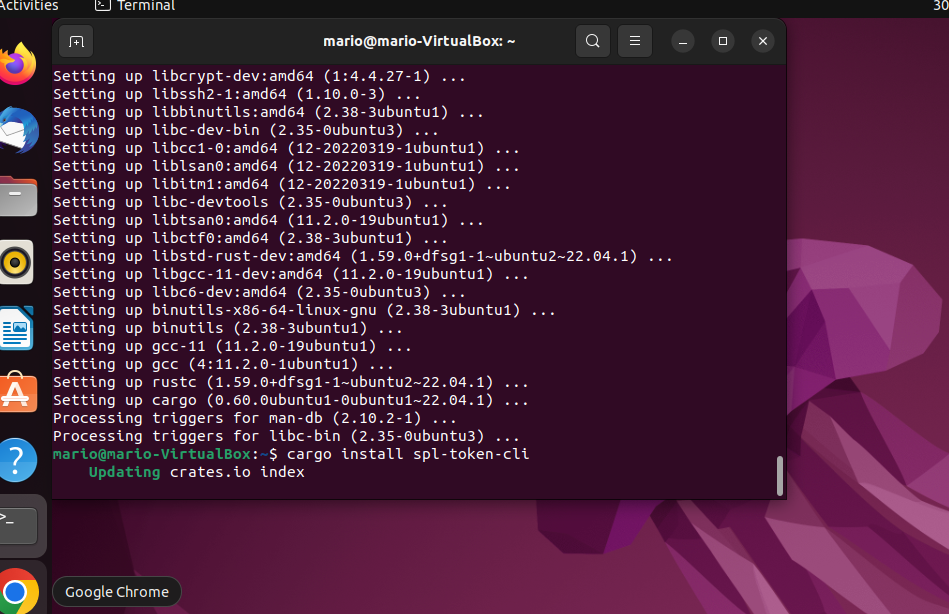
Now the next bit takes ages, so go & get something alcoholic;
Sudo apt install libudev-dev
Sudo apt install libssl-dev pkg-config
Sudo apt install build-essential -y
Sudo apt install cargo
Cargo install spl-token-cli
Create your own token
Surprisingly, this bit is pretty straight forward. Its a single command;
spl-token create-token
you’ll want to make a note of both the signature, (not so important) but the token key – this is the unique identifier for your particular token. You now want to create an account to hold that type of token, so you then generate tokens & mint them; so….
spl-token create-account
This will give you an account id, which you should also make a note of. You’ve now created a token, an account to house that token, in effect you’ve built a bank to house a new currency, and now you can start creating some tokens for distribution on the block chain
So, you’re going to mint (in effect print) some tokens, of a token type (using the token id you made a note of), specify the amount of token you want to create, and then the account you will use to store them. The command is;
spl-token mint (token type) 100000 (token account)
Check your token account
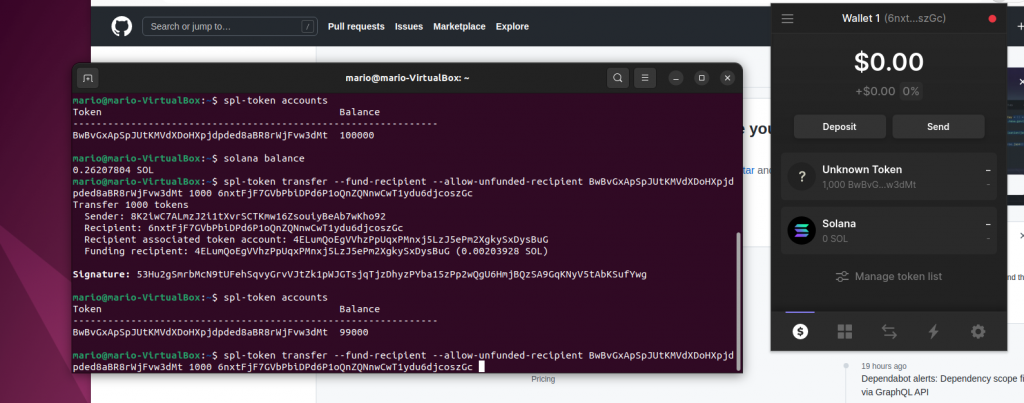
The thing to do now is run the following command to check you have a deposit of in this, case, I minted 100,000 tokens
spl-token accounts
Fund a wallet with the tokens you’ve just created
Now what you want to do is transact those tokens. So try sending them to a public wallet using the following command;
spl-token transfer --fund-recipient --allow-unfunded-recipient (token id) (wallet)
What the command is doing above is first saying to transfer the tokens you’ve created, to a recipient, then to create an account that’s compatible to accommodate the token we’ve created, (thats the fund-recipient switch), then ignore the fact the recipient doesnt yet have a compatible account in their wallet to accomodate this token, go ahead & fund anyway (that’s the allow-unfunded-recipient switch) then use this token id (the one we’ve built) and finally the recipient wallet.
All being well, you’ll get a transaction log and within seconds, if you open your (in this example, Phantom wallet) in Chrome, you’ll see a 1000 of an unknown token.
You did it! You just made your own token.
Validating your transaction on the blockchain
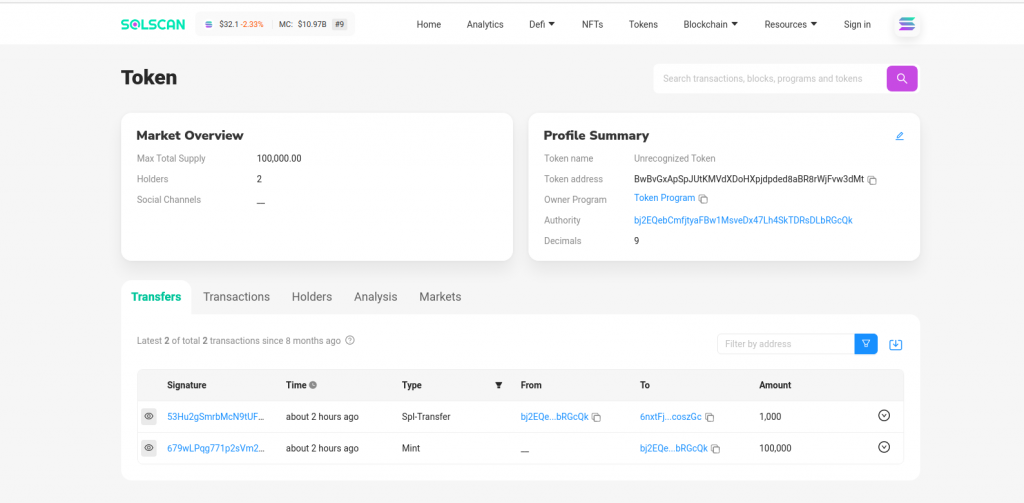
For every blockchain, there’s a audit tool letting you view every transaction that’s occurred on that particular blockchain. This is the immutable bit that we talked about earlier. Whatever you do, is logged on the block chain forever. Here you can see, using Solscan, the token we’ve created, minted & and distributed to two wallets. It then shows those transactions as a ledger.
Branding your token
Although pretty straight forward, the Solana repo has been made read-only shortly after the time of writing this. But I’m going to do this experiment again elsewhere now I’ve learnt a bit. Basically the process is.
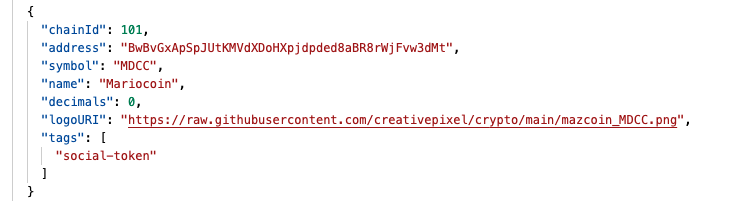
First thing is you need to create an image for your token. This should be a <200k PNG square, I use a 150×150 image of whatever I want to use. You must call it logo.png. Create a fresh repo on your Github account, and add it. Then download it to get the github URL

- Pull from the Solana repo, github.com/solana-labs/token.list and fork a copy to your own machine.
- Open the IDE/editor using period in your browser and touch the following files
- assets – create a new folder with the name of your token id
- in this folder, put the logo.png file you created above
- assets – create a new folder with the name of your token id

3. Then touch source/tokenlist
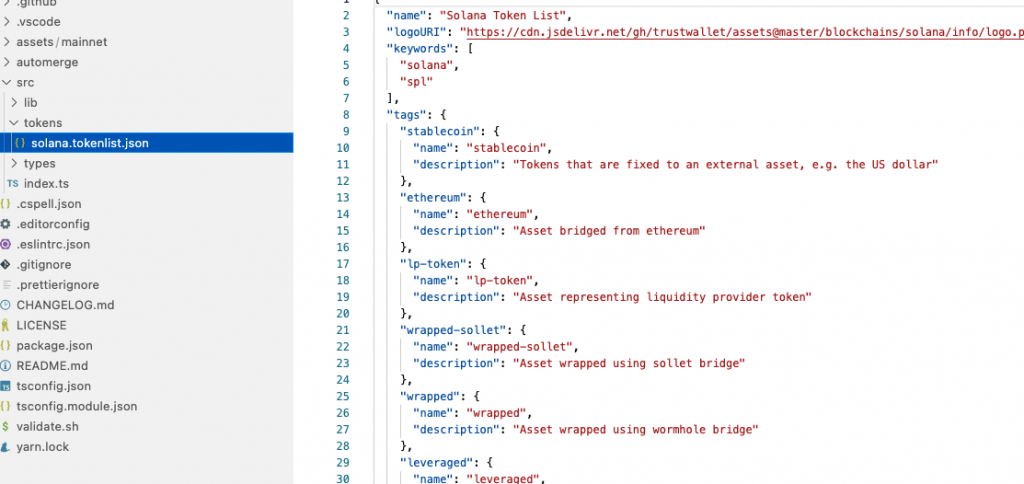
This is a pretty straight forward json file. Go to the end of the file, copy the last entry, ensure to drop the comma before you cut & paste, and make changes to address, (with your own token id), the symbol (in my case, MDCC) and a corresponding name along with the github url for the image. Because this is a social token you can leave that bit as it, but you can add additional identifiers here dependant on what you want to do with the coin.
Merge it with the main solana fork, give it a bit of time, and you’re done!